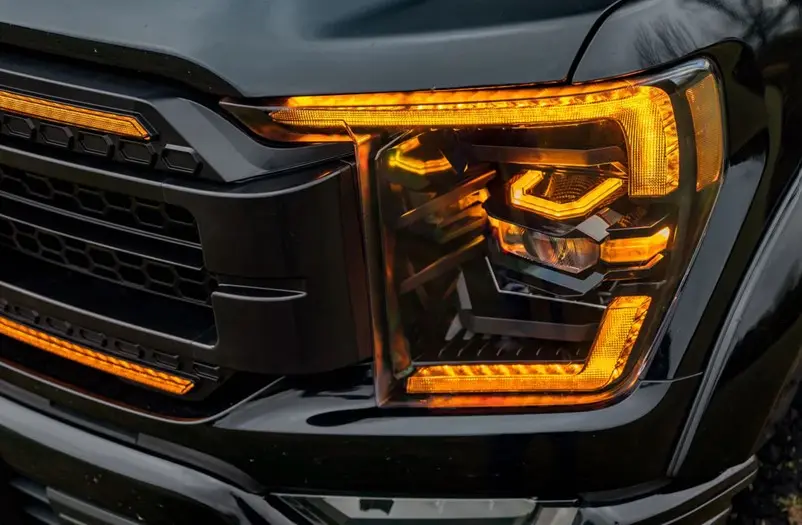
Thinking about swapping out your F150 headlights on your own? Whether you’re upgrading to a sleek LED set or just replacing a busted halogen bulb, doing it yourself can be satisfying—and it might even save you a trip to the shop. But before you crack open the toolbox, there are a few things you should know. DIY installations can go smoothly if you’re prepared, but they can also lead to frustration (and a few busted knuckles) if you rush in without the right game plan.
Why People Upgrade Their F150 Headlights
Most truck owners decide to upgrade their F150 headlights for better visibility, aesthetics, or both. If you’re driving an older model, those stock halogens might not be cutting it—especially at night or in bad weather. LED or projector F150 headlights offer sharper light patterns and last way longer. And let’s be honest: upgraded lights just look cooler, giving your ride a modern, custom vibe without breaking the bank.
What You’ll Need Before You Begin
Before you start removing your old F150 headlights, check that you’ve got everything you need. You don’t want to be mid-installation and realize you’re missing a crucial socket or wire adapter.
Here’s a basic checklist:
- Replacement F150 headlights (check fitment for your exact model year)
- Socket wrench set
- Flathead screwdriver
- Trim removal tool
- Gloves (optional, but helpful)
- Dielectric grease (for sealing connections)
- Owner’s manual or a how-to guide specific to your F150 model
Having these items nearby will help the installation go much smoother. Trust us—there’s nothing worse than dropping a screw into your engine bay and spending an hour fishing it out.
Know Your F150’s Headlight Assembly
Depending on your truck’s model year, the headlight housing might be secured with clips, bolts, or a combo of both. For most F150 trucks, especially post-2015 models, accessing the F150 headlights often means removing part of the grille or front bumper. That sounds intimidating, but it’s manageable with patience and a YouTube video or two.
Take note: older F150 models (pre-2014) tend to have simpler assemblies, while newer trucks often come with more wiring for daytime running lights and adaptive systems. Either way, understanding how your F150 headlights are secured will save you from unnecessary prying or damaging parts.
Step-by-Step Guide: Replacing Your F150 Headlights
Let’s break down the installation process into manageable steps:
- Disconnect the battery. Safety first—always cut power before working with anything electrical.
- Remove the grille or bumper (if needed). Use your trim removal tool to pop out clips. Then unbolt any screws holding the grille in place.
- Access the headlight housing. Once you see the back of the F150 headlights, you’ll usually find two to three bolts securing them.
- Unbolt the housing. Be gentle when sliding the headlight unit out—you don’t want to tug on wiring.
- Disconnect the wiring harness. Some newer lights have complex connections. Make sure you label them or take photos before unplugging.
- Install your new F150 headlights. Plug in the new lights, bolt them in place, and test before reassembling.
- Reinstall the grille or bumper. Once everything works, put it all back together and reconnect the battery.
If you’re installing aftermarket LED F150 headlights, you may also need to add resistors or decoder modules to prevent flickering or error codes.
Common Mistakes to Avoid
It’s easy to get excited and skip a step, but don’t fall into these common traps:
- Forgetting to test the lights before putting everything back. Always turn them on to ensure everything’s wired correctly.
- Using too much force. Many F150 headlights are held in place with plastic tabs that can snap if you’re too aggressive.
- Skipping dielectric grease. A little on the connectors goes a long way in preventing moisture buildup and corrosion.
These little details can make or break your DIY install, so take your time and don’t rush it.
When to Consider Professional Help
Sometimes, it’s better to call in an expert—especially if your truck’s wiring looks like spaghetti or if your new F150 headlights have built-in features like adaptive lighting or turn signal animation. Professionals can ensure proper alignment, prevent dashboard warning lights, and save you hours of frustration.
If you’re not 100% confident, consider doing the prep work yourself (removing the grille, for example) and letting a pro handle the wiring and calibration.
Staying Street Legal: What You Need to Know
Just because a set of F150 headlights looks amazing on your truck doesn’t mean they’re legal in every state. Some LED or HID kits produce intense brightness or non-compliant beam patterns. Before installing, check your local vehicle codes or look for DOT-approved headlights to avoid failed inspections or fines.
Here’s a quick chart you can reference for general compliance tips:
| Feature | Street Legal? | Notes |
| DOT-Approved LEDs | ✅ Yes | Best for safety and legality |
| HID Retrofit Kits | ⚠️ Maybe | Legal if properly housed |
| Colored Halo Rings | ❌ No | Illegal in most states |
| Adaptive Headlights | ✅ Yes | Factory or OEM-quality preferred |
Final Tips for a Successful Install
- Read online reviews and forum threads before buying your F150 headlights. Others might share tips or issues they faced with the same model.
- Keep your old headlights. If something goes wrong, it’s good to have a backup set until you sort things out.
- Align the beam pattern after installation. Misaligned lights can blind other drivers or reduce your visibility.
Installing F150 headlights yourself isn’t just about saving money—it’s about customizing your truck to fit your style and needs. With the right prep, tools, and patience, you can pull it off like a pro.
Also Read-Car Detailing Darwin: The Key to Keeping Your Car in Top Condition


